- ◆Most leads do not go cold on their own. They go cold because no one followed up before the window closed.
- ◆This guide covers what an automated follow-up sequence looks like, how to build one in Make.com, and what the messages should actually say.
- ◆No code. Works with most contact forms and CRMs. A few hours to set up the first time.

The lead came in Wednesday. You saw it, meant to reply, something came up. By Thursday morning it had slipped. You replied Friday. Nothing back.
It did not go cold. It went cold while you were deciding when to reply.
Research from Harvard Business Review suggests businesses responding to leads within the first hour are significantly more likely to have a meaningful conversation than those who wait. After 24 hours, most have moved on.
For estate agents, this problem shows up most clearly with portal enquiries. There is a full guide to replying to Rightmove and Zoopla enquiries faster with AI if that is your specific bottleneck.
Automated lead follow-up handles this. The acknowledgement goes out immediately. The sequence runs on a timer. You get on with the work.
If you want an overview of all five admin tasks worth automating first, start with Part 1.
What You Will Learn
– What a basic follow-up sequence looks like
– How to build one in Make.com, step by step
– What the three messages should actually say
– The one step most people skip that causes problems
– What to do when someone replies

What an Automated Follow-Up Sequence Looks Like
A follow-up sequence is a series of timed messages triggered by one event, usually a form submission or a new enquiry in your CRM. You write the messages once. The sequence runs every time a new lead comes in.
A basic three-step version looks like this.
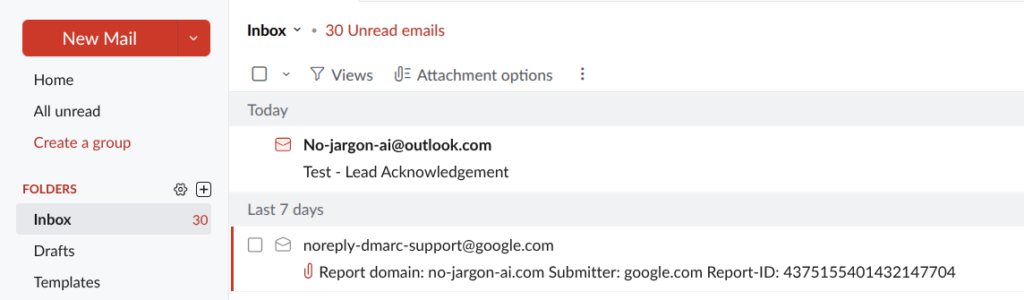
Step 1 — Immediate. Goes out the moment the form is submitted. Confirms receipt and tells them when to expect a proper reply.
Step 2 — 24 hours. A brief check-in. Warm tone. Easy to reply to.
Step 3 — 72 hours. Closes the loop without pressure. Leaves the door open, nothing more.
| Message | When it sends | Purpose | Tone |
|---|---|---|---|
| 1. Acknowledgement | Immediately | Confirm receipt, set expectation | Warm, practical |
| 2. Follow-up | 24 hours later | Stay visible, invite reply | Friendly, low pressure |
| 3. Close-off | 72 hours later | Leave the door open | Light, no pressure |
The sequence stops the moment someone replies or books a call. Setting up that reply detection is the step most people miss. It is covered in the build below.
How to Build It in Make.com
Get three things ready before you open Make.com: your form or CRM connected as a trigger source, a free Make.com account, and your three messages written out. The build goes faster when the content is already done.
- A contact form or CRM connected to Make.com (Typeform, Jotform, Google Forms, GHL, or similar)
- A Make.com account — free to start
- Three draft messages written and ready to paste in
- A decision on what counts as a reply — email reply, booking made, or both
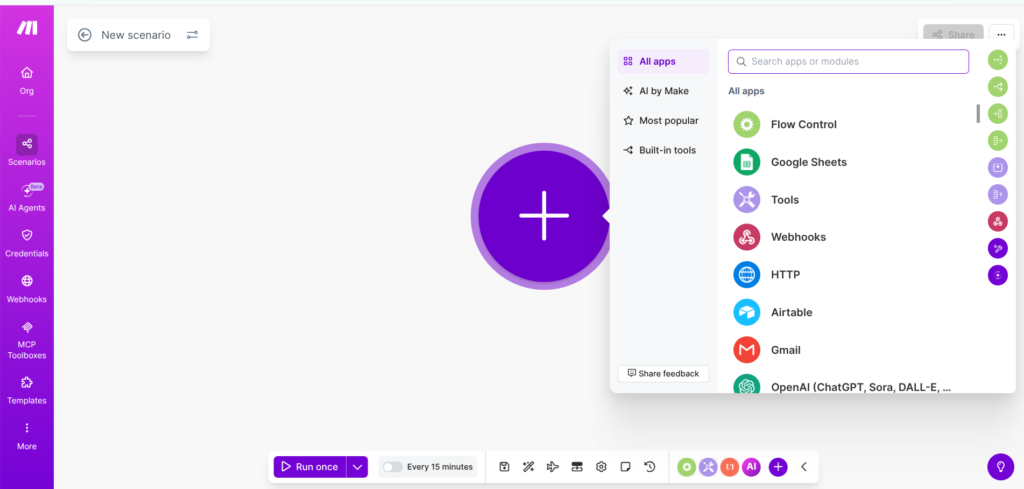
Step 1 — Set Your Trigger
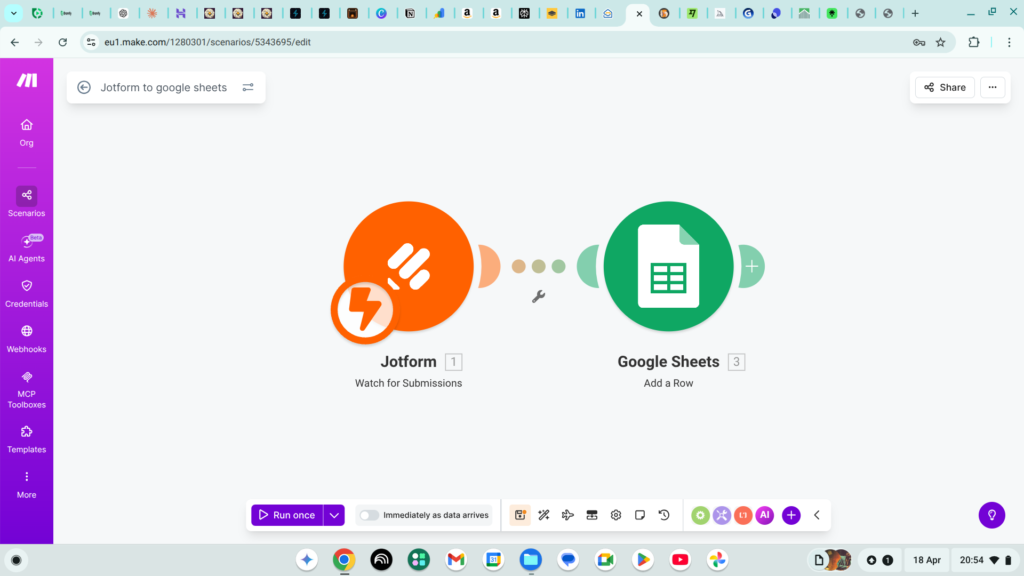
Click the first empty module in Make.com and search for your form or CRM tool. Select the trigger that fires when a new submission comes in.
If your form tool is not in the library, use the Webhooks module instead. Paste the webhook URL into your form settings. Make.com walks you through it.
Still stuck? Ask an AI to walk you through it
If the trigger setup is not clicking, paste your question into Claude or ChatGPT and describe exactly what you are trying to connect. Something like: “I am trying to connect [your form tool] to Make.com to watch for new submissions. Walk me through it step by step.” Both have free plans and are surprisingly good at Make.com troubleshooting. They will not build it for you but they will talk you through each step until it works.
Step 2 — Add the Immediate Acknowledgement
After the trigger, add an email module. Set the recipient to the lead’s email from the form data. Paste in your first message. No delay needed on step one — it fires immediately.
“Hi [first name], thanks for getting in touch, got your enquiry. I will be back to you within [timeframe]. Anything urgent, just reply to this.”

Step 3 — Add a Delay Then the Follow-Up
After the first email, add a Sleep module set to 24 hours. Then another email module with your second message. Make.com pauses the scenario at the Sleep module and picks it back up after the delay.
“Hi [first name], just following up on your enquiry from yesterday. Happy to answer any questions, just hit reply. If you would like to book a call, here is a link: [link]. “
Step 4 — Add Reply Detection Before the Final Message
This is the step most people skip. Without it, automated messages keep going to leads who have already replied.
After the second email, add a Router module. One path checks whether a reply has been received. If yes, the sequence ends. If no, it continues to the 72-hour delay and final message.
How you set this up depends on your email tool. In Gmail, watch for threads with a reply. In GHL, check the contact’s status. The Make Master will give you the specific modules for your setup.
The step most people miss
Reply detection. Without it your automation keeps messaging people who have already got back to you. Takes an extra twenty minutes to set up and saves a fair amount of awkwardness down the line.
Step 5 — Final Message and Close
After the reply check, add a 72-hour Sleep module and your third message. After that, the scenario ends.
“Hi [first name], last one from me for now. If the timing is not quite right, no problem. You can get back in touch here whenever it suits: [link or email].”
A quick note on consent
Automated follow-up messages are marketing communications under UK GDPR. Anyone receiving them should have given consent, usually through your enquiry form. Check the ICO website if you are not sure whether your form covers this before switching it on.
Testing Before You Switch It On
Submit a test enquiry using your own email address and watch the scenario run. In Make.com, click Run Once to trigger it manually and see each module fire in real time.
Check three things: the first message arrives immediately, the delays are correct, and the sequence stops when you reply to message one. If something fails, the scenario history shows you which module and why.
Before you build — a few things worth knowing
Setting up the trigger is the part most people get stuck on. A few things that help.
Most form tools need an API key to connect to Make.com. You will find yours in your form tool’s account settings under API or Integrations. It is a one-time setup.
If your form tool is not in Make.com’s module library, use a Custom Webhook instead. In Make.com, add a Webhooks module and select Custom Webhook. Make.com generates a URL. Paste that URL into your form tool’s notification or integration settings. No API key needed. Make.com just listens for anything sent to that address.
If the scenario runs but nothing fires, check that your form tool is actually sending data to the webhook URL. Most tools have a test or preview send option in their settings. Use that to trigger it manually and watch whether Make.com picks it up.
If you get stuck, the Make Master will tell you exactly which modules to use for your specific setup.
What Happens When Someone Replies
The sequence stops and you take over. The automation handled the first part. What comes next is a conversation.
If repeat questions from new contacts are eating into your time, this guide on automating the questions clients ask every week covers that next.
If that conversation leads somewhere and they become a client, the next gap tends to be what happens after they say yes. Most small businesses have a reasonable follow-up process and then wing the onboarding. That is covered in Part 5: What Happens After Someone Says Yes?
- Trigger connected and tested with a real form submission
- All three messages written, personalised, and proofread
- Delays set correctly — 24 hours and 72 hours
- Reply detection set up and tested
- Test run completed using your own email address
- Consent wording checked on your enquiry form
Want to Map It Out Before You Build?
The Blueprint Drawer helps you plan your automation before you open Make.com. Sketch out your trigger, your steps, and your messages in one place. Free.
Try the Blueprint Drawer → One page. No signup faff.Questions People Actually Ask
Set up a Make.com scenario triggered by a new form submission. Add an immediate acknowledgement, a 24-hour follow-up, and a 72-hour close-off message, with reply detection between each step. This guide walks through the full build above.
As quickly as possible. Research suggests the first hour matters considerably. An automated immediate acknowledgement handles this even when you are not available.
Keep it short and warm. The first confirms receipt, the second is a brief check-in, the third closes the loop without pressure. Adapt the templates in this guide to your own tone before using them.
Three tends to be enough. More than that and it starts to feel like pressure rather than follow-up.
Probably. Make.com connects to most CRMs. If yours is not in the library, most support webhooks as a workaround. The Make Master will give you the specific modules.
Yes, with consent in place. Check the ICO website for guidance on what counts as legitimate interest for business follow-up communications before switching it on.
The sequence stops and you take over. Set up reply detection in your scenario so no further automated messages go out once a conversation has started.
Getting Paid Shouldn’t Be This Uncomfortable
Follow-up sorted. Next most common gap: invoice chasing. The task everyone puts off because it feels awkward. This guide covers automating the whole thing so the reminders go out on schedule whether you feel like sending them or not.
Read Part 3 →